
Every decision you make in the edit is made on a screen. Choose that screen carefully.
Photographers spend months comparing camera bodies and lenses, and then edit a wedding on whatever laptop or office monitor happens to be on the desk. The result is familiar: reds that look perfect while editing turn orange on the client’s phone, skin tones look muddy in the album, and shadow detail you thought was there prints as solid black.
Your monitor is the one place where you see your photographs before anyone else does. This PROLENS guide explains what separates a photo monitor from an ordinary screen, which specifications actually matter, and how to choose the right one for the work you do in India.
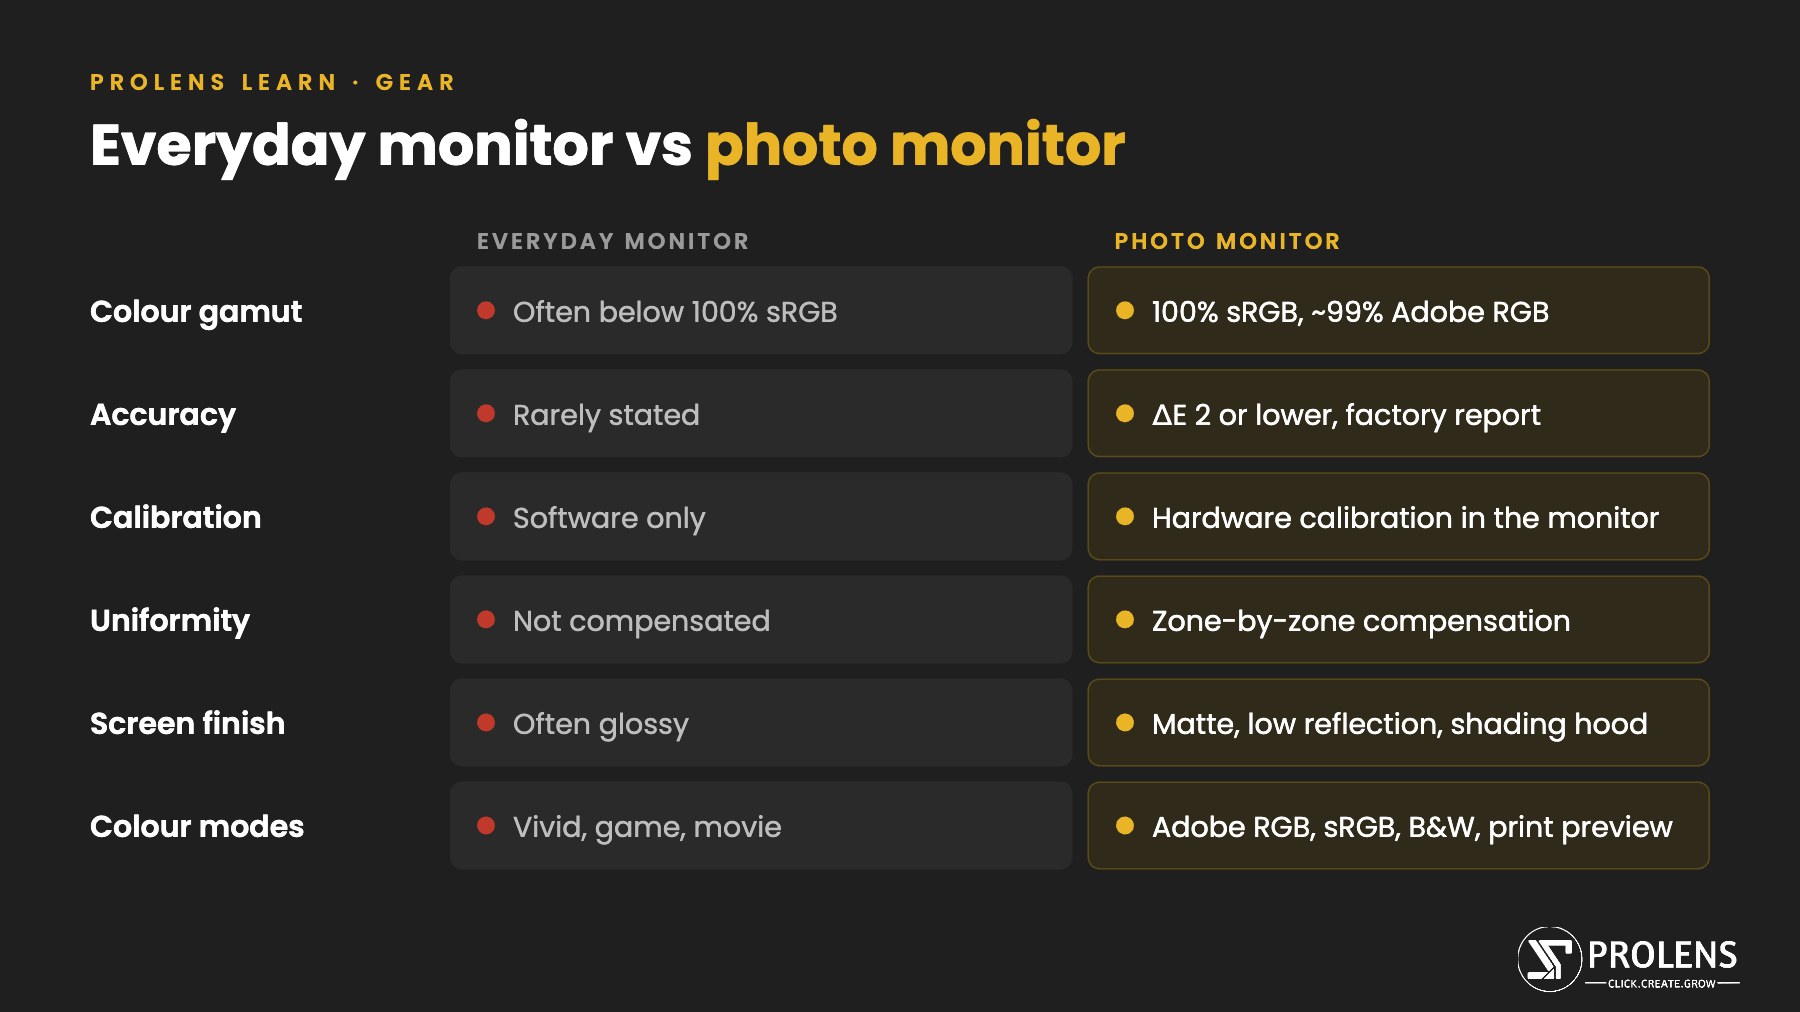
1. Why Your Monitor Matters More Than You Think
Every slider you move in Lightroom or Photoshop is a judgement based on what the screen shows you. If the screen exaggerates saturation, you pull colour out of the image. If it runs too bright, you darken your files. If it cannot show certain shades at all, you never see the problems in them.
- Client delivery: an accurate screen is the only fixed reference point between your camera and hundreds of different client phones.
- Albums and prints: labs print what is in the file, not what your screen showed you. A screen that hides colour or tonal errors sends those errors straight to print.
- Time: editing on a screen you can trust means fewer re-edits, fewer reprints and fewer awkward calls with clients.
2. Colour Gamut: Can the Screen Show the Colours You Shoot?
Colour gamut is the range of colours a monitor can physically display. It is usually quoted as a percentage of a standard colour space:
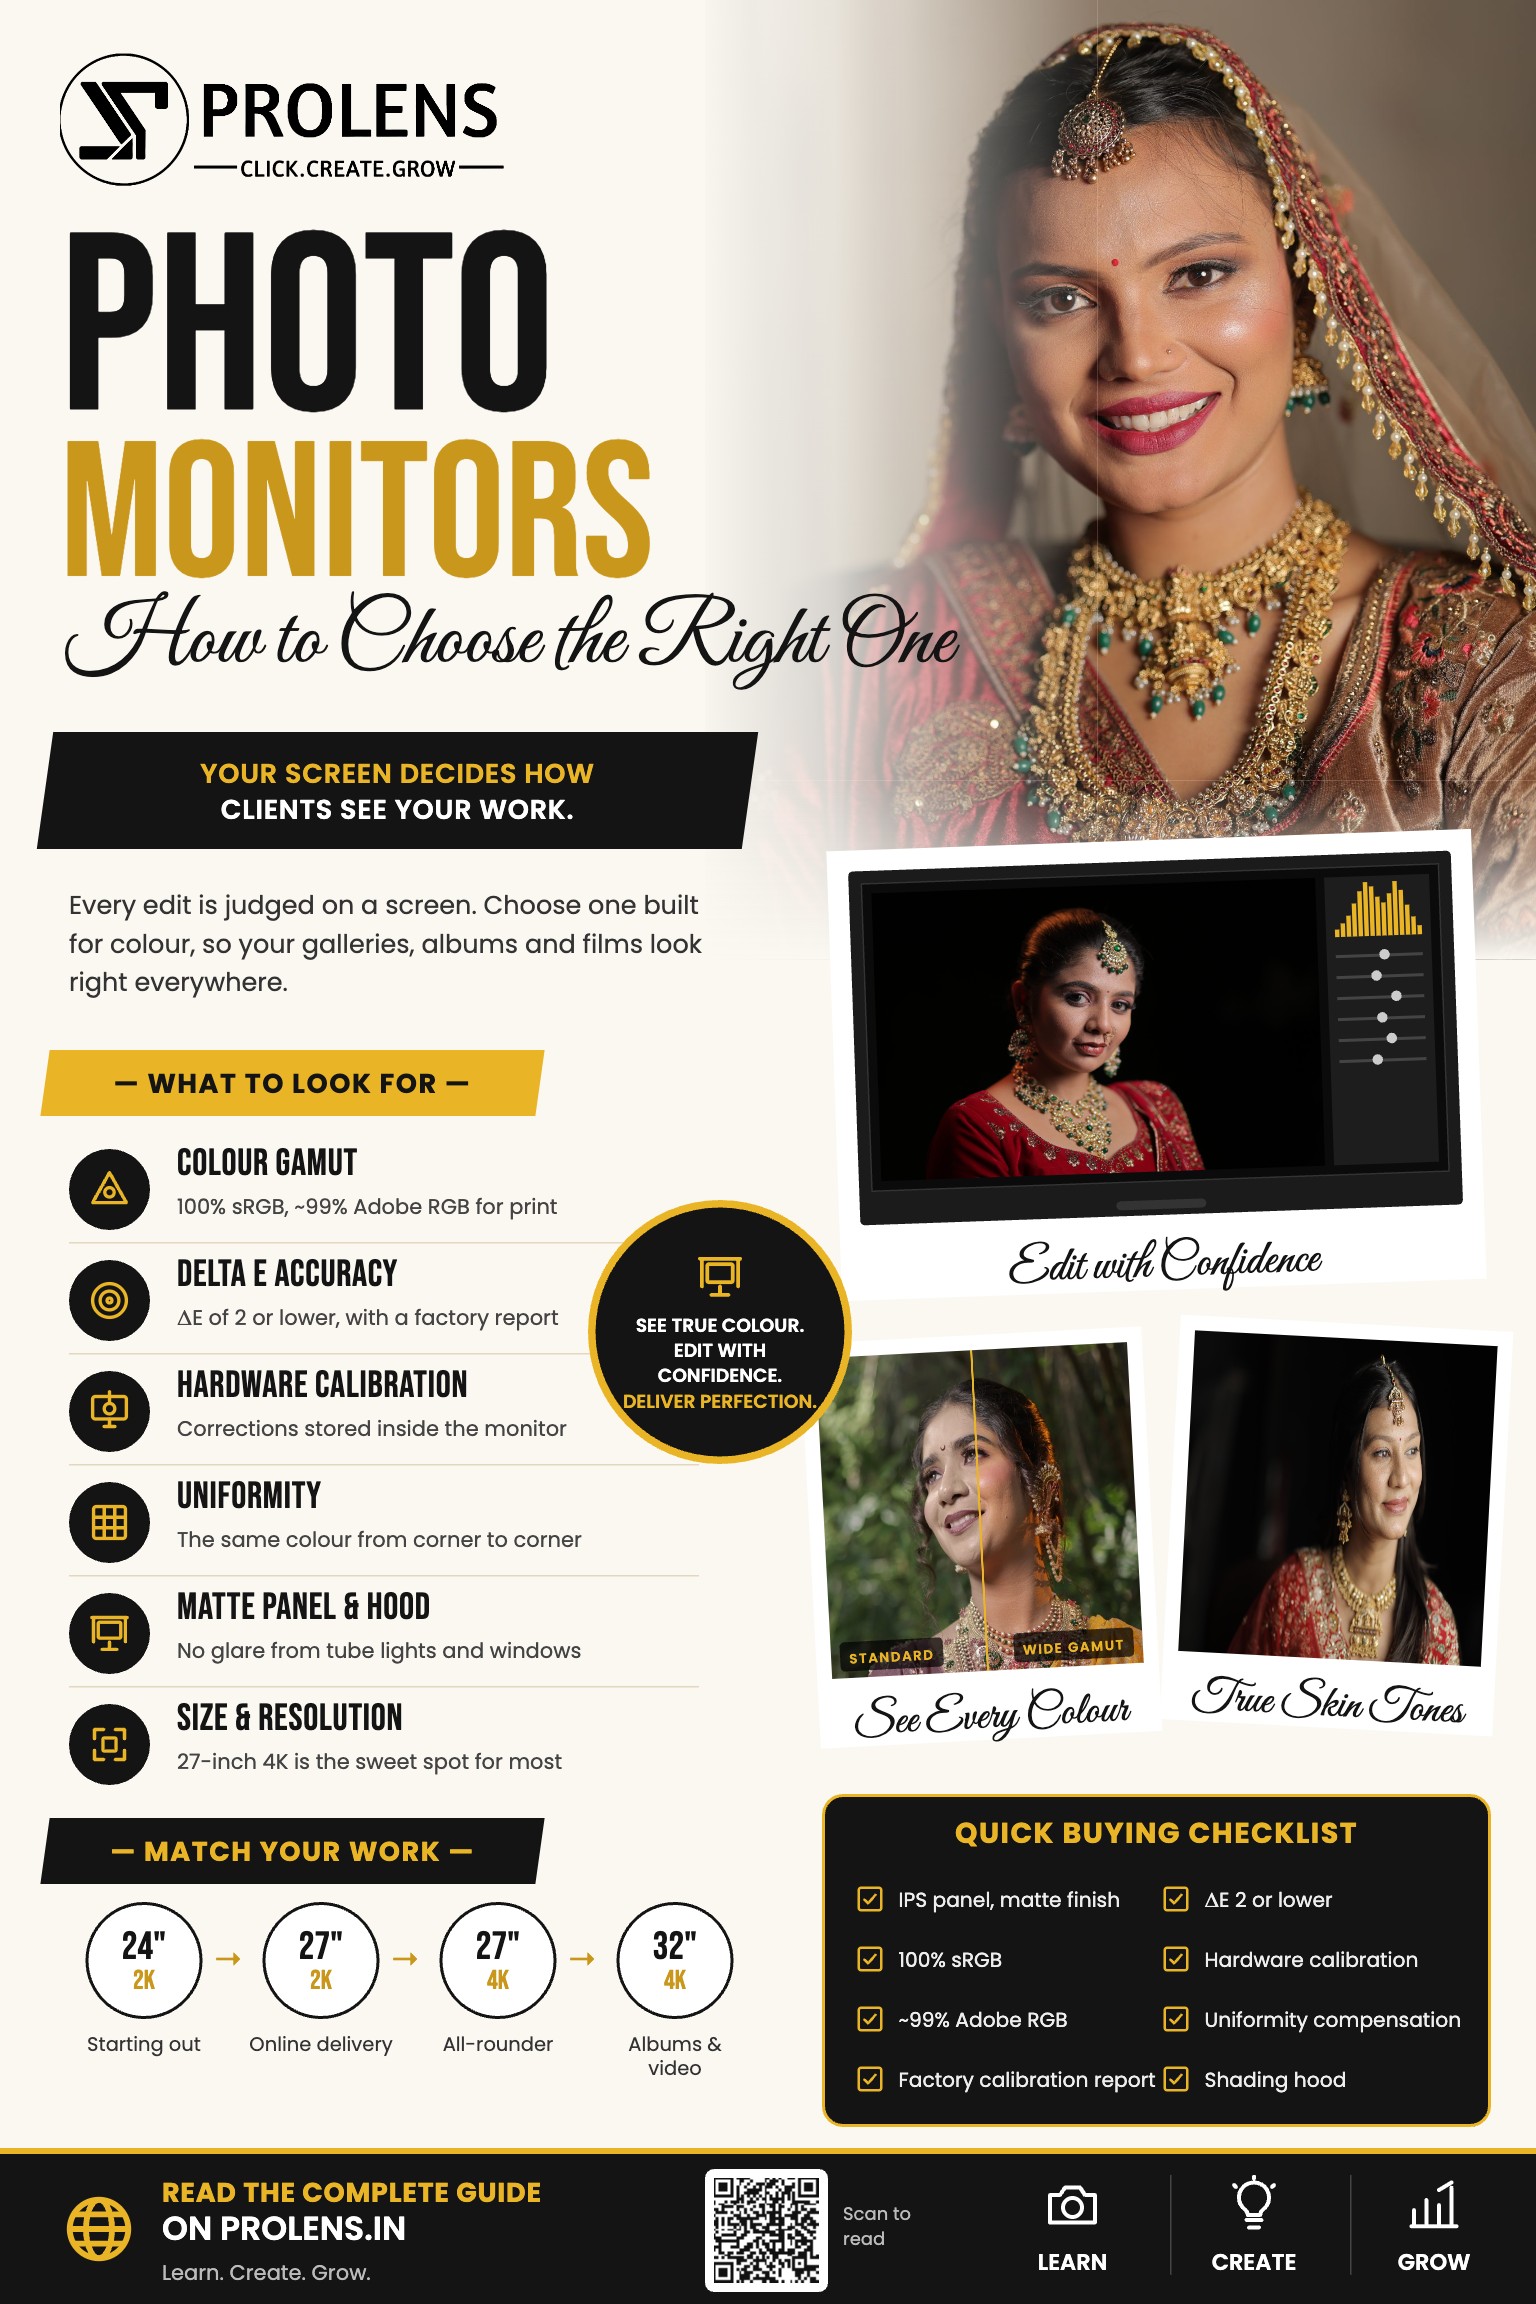
- sRGB: the standard for the web, phones, WhatsApp and social media. Every photo monitor should cover close to 100%.
- Adobe RGB: a wider space that includes more saturated greens, cyans and some reds. It matters if you print albums, fine-art prints or large canvases.
- DCI-P3 / Display P3: the space used for cinema and many modern phones and laptops. Useful if you also shoot films or edit on a Mac.
Indian work tests gamut hard. Bridal lehengas, kanjeevaram silks, mehendi greens and festival colours sit right at the edge of what standard screens can display. On a screen that cannot reach them, you simply cannot see what you are adjusting.
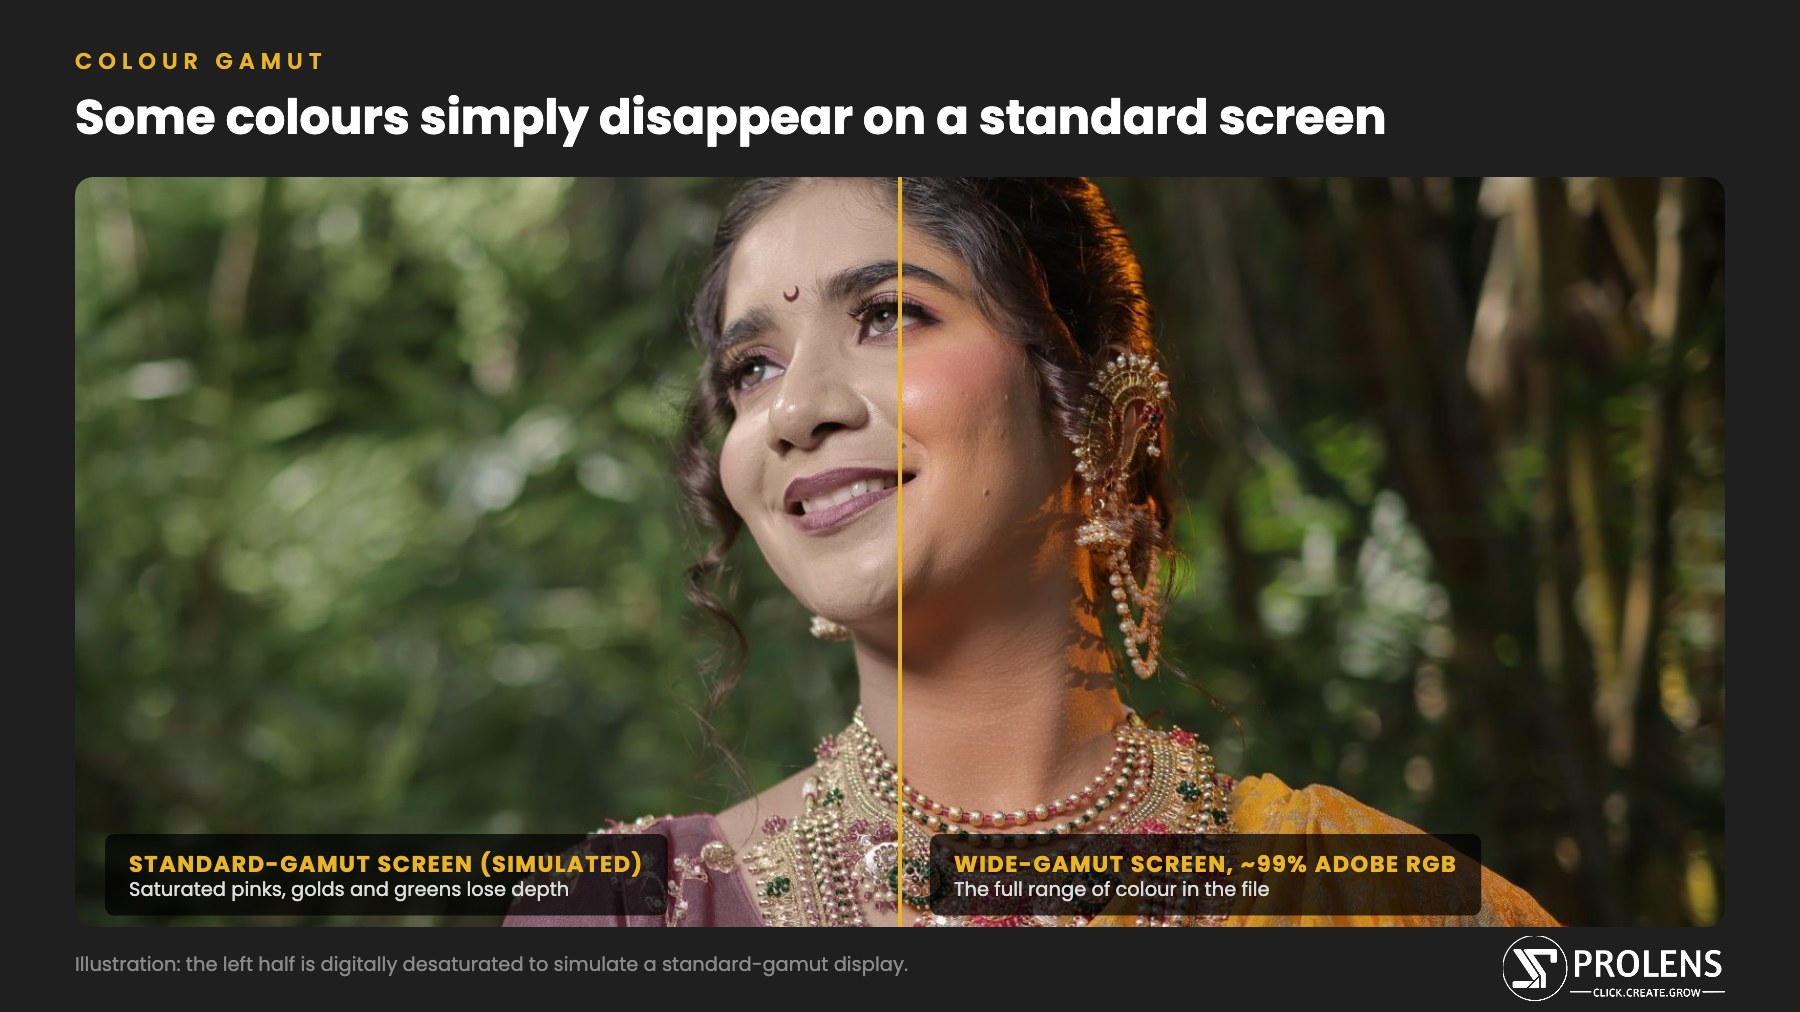
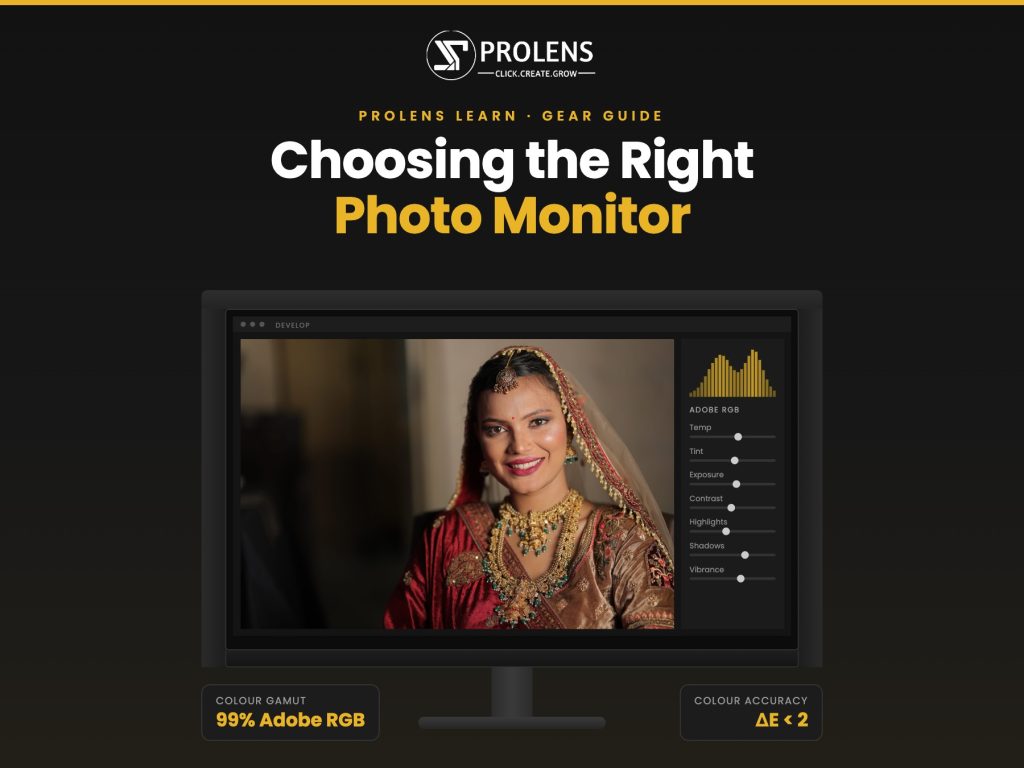
Look for the word coverage on the spec sheet, not just “area” or “volume”, which can exceed 100% without covering the colours you need. Monitors designed for photographers, such as BenQ’s SW series, typically list around 99% Adobe RGB alongside 100% sRGB. Some also offer a dual-gamut view, which BenQ calls GamutDuo, so you can compare how an image looks in Adobe RGB and sRGB side by side before exporting.
3. Accuracy: Delta E and Factory Calibration
A wide gamut is only useful if the colours are also accurate. Accuracy is measured as Delta E (ΔE), the difference between the colour the screen should show and the colour it actually shows.
- ΔE below 2: differences are very hard to see. This is a good target for a photo monitor.
- ΔE of 1.5 or lower: excellent, and what serious photo monitors aim for.
- ΔE above 3: visible shifts, often in skin tones and neutrals.
Good photo monitors are calibrated individually at the factory and ship with a calibration report for that unit. Independent certifications such as Calman Verified and Pantone Validated are a useful extra check. Some BenQ photographer monitors also carry Pantone SkinTone validation, which tests how accurately the screen reproduces a wide range of real skin tones, a genuinely useful check when one family photo can include very different complexions.
4. Hardware Calibration: The Feature Most Buyers Miss
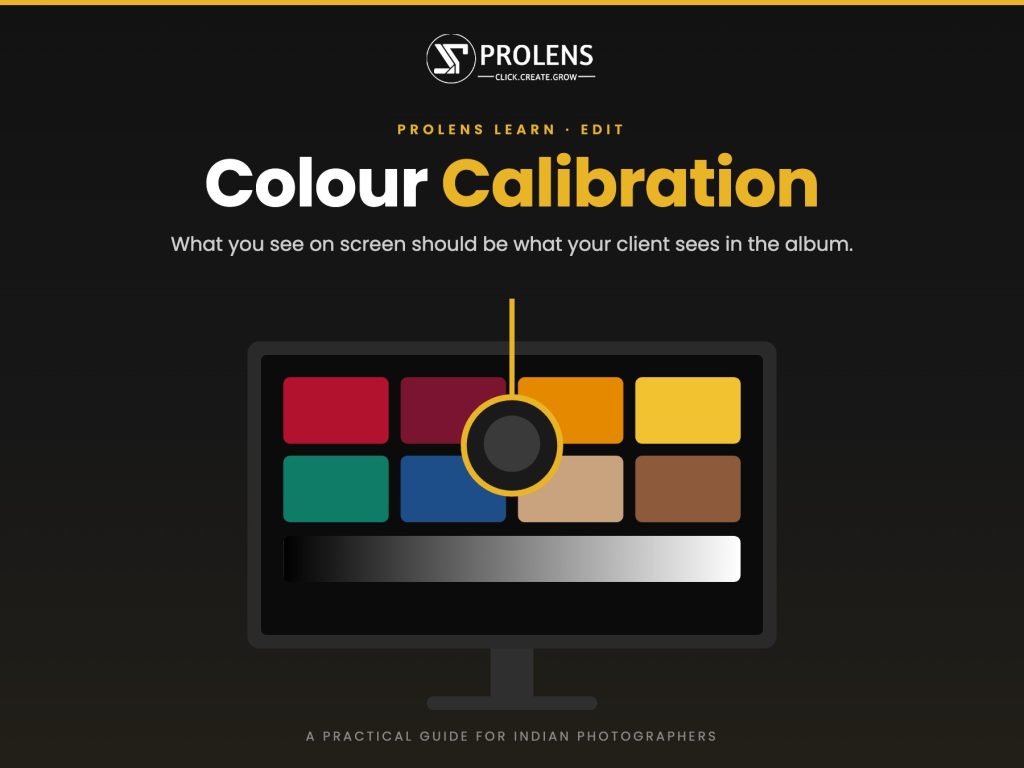
Every monitor drifts with age and use, so you will need to calibrate it regularly. How the monitor handles calibration makes a big difference.
- Software calibration stores the correction on your computer’s graphics card. Correcting colour there reduces the number of tones available, which can cause banding in skies, studio backdrops and smooth skin.
- Hardware calibration stores the correction inside the monitor itself, in its own look-up table (LUT). Your computer sends the full image and the monitor does the correction with far more precision.
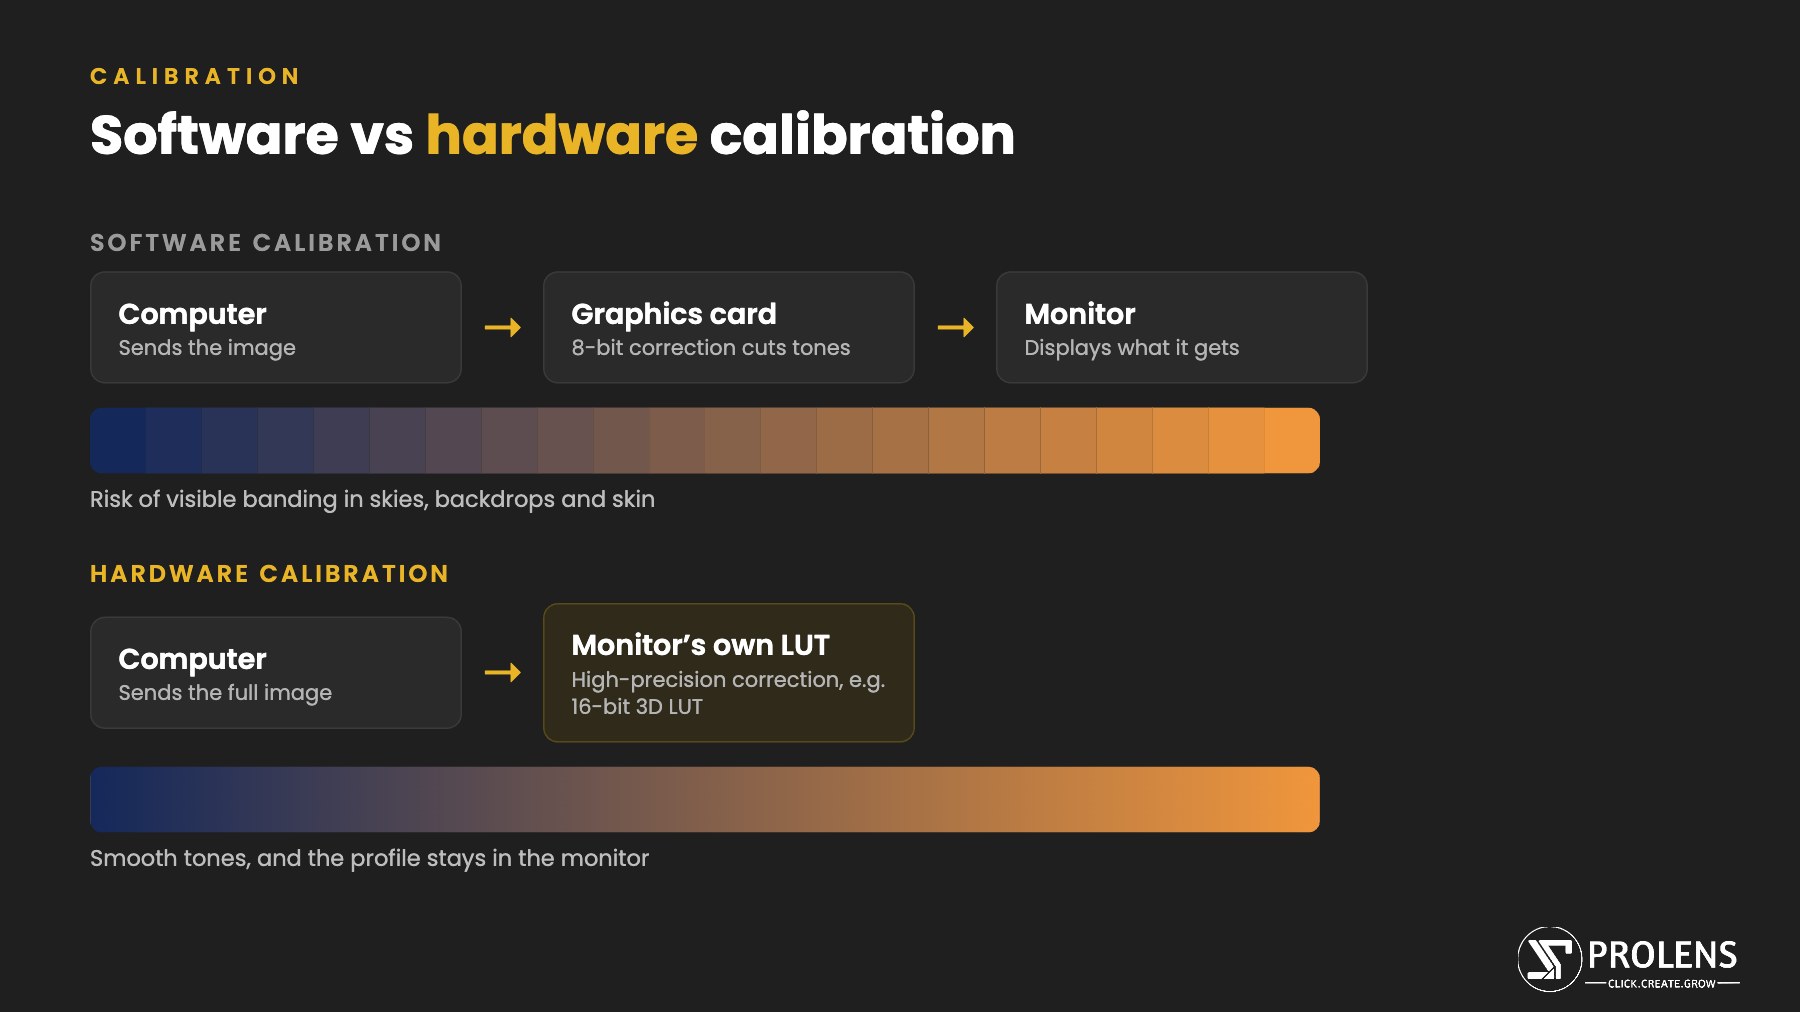
For photography, a monitor that supports hardware calibration is worth paying for. BenQ’s SW series, for example, uses an internal 16-bit 3D LUT on models such as the SW242Q and SW321C, along with its Palette Master Ultimate software, which works with popular colorimeters from Calibrite and Datacolor. The calibration is saved in the monitor, so it stays correct even when you plug in a different laptop. For a step-by-step process, read our colour calibration guide for Indian photographers.
5. Uniformity: Is the Whole Screen Telling the Same Story?
Most monitors are slightly brighter or warmer in some areas than others, often at the corners. On an office screen you will never notice. In photo editing it means a wedding portrait can look different depending on where it sits on the screen, and you may correct a colour cast that is not really in the file.
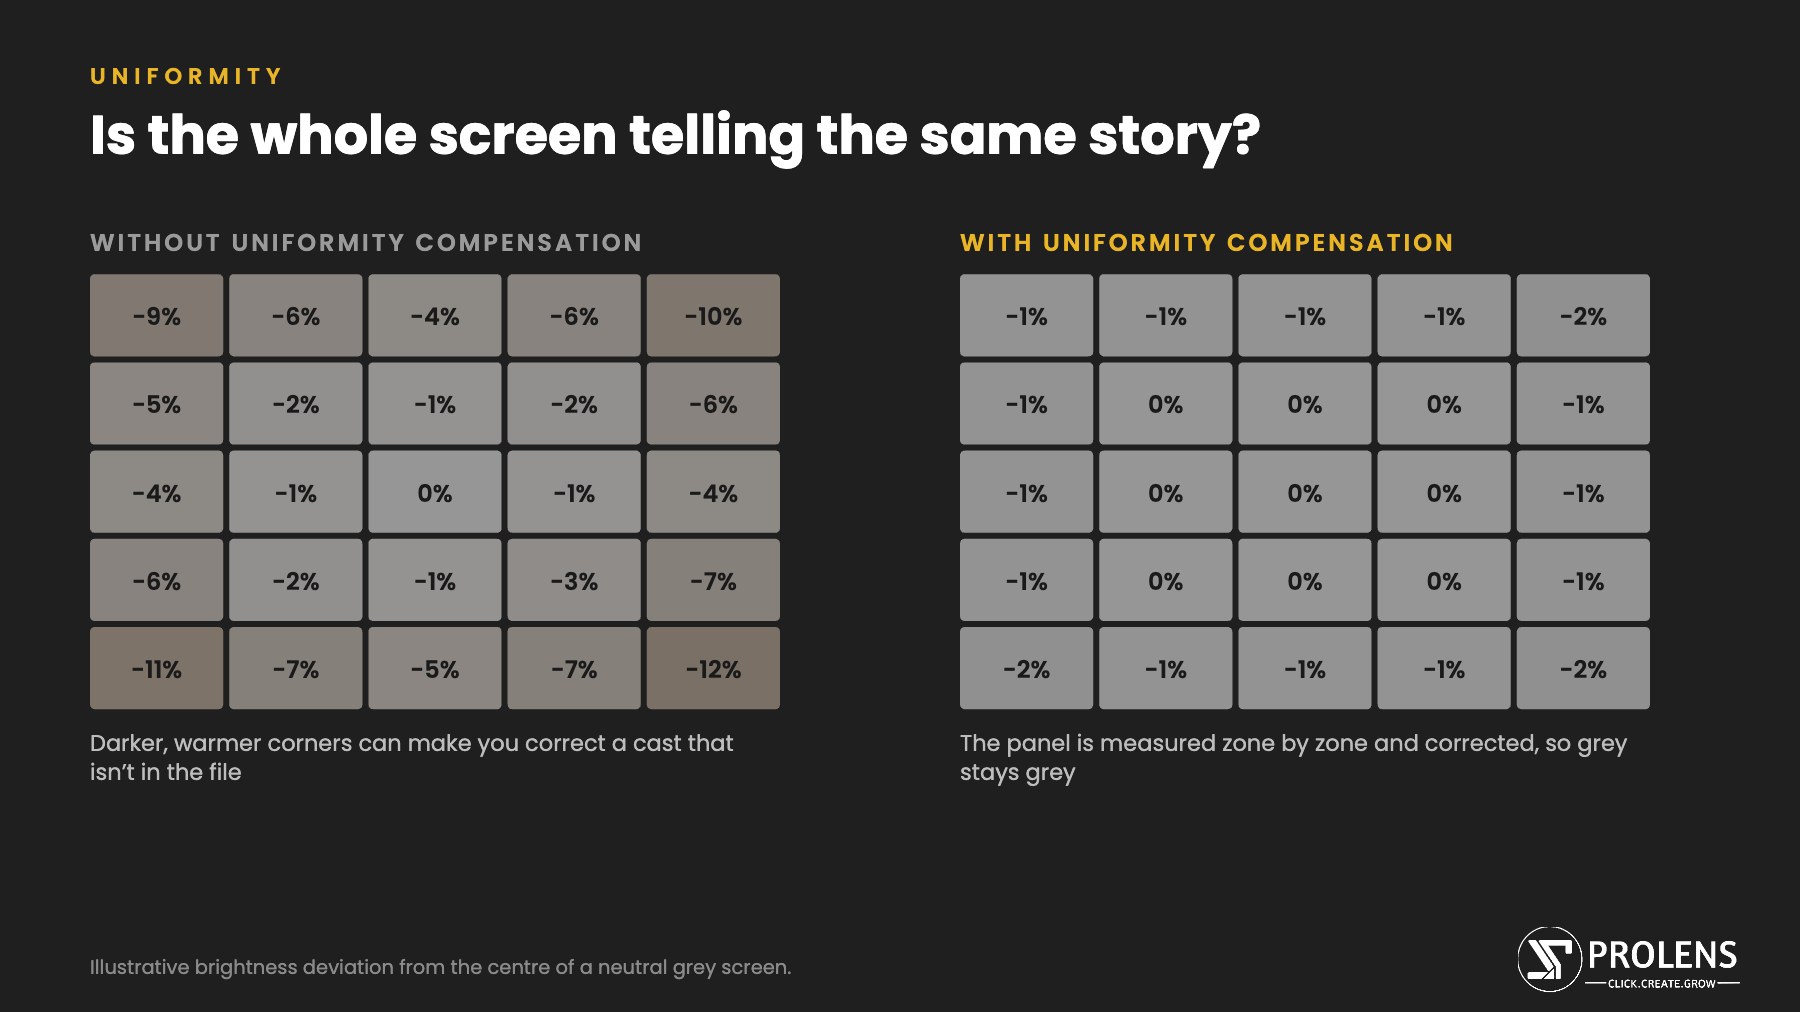
Photo monitors measure the panel in many zones and compensate for these differences. BenQ, for instance, divides the panel on photographer models such as the SW321C into hundreds of sub-regions and applies uniformity correction to each, so a neutral grey looks neutral from corner to corner. When comparing models, check whether uniformity compensation is listed and whether it is included in the factory report.
6. Panel Type and Screen Finish
The panel technology affects how consistent colours look and how the screen behaves in a real room.
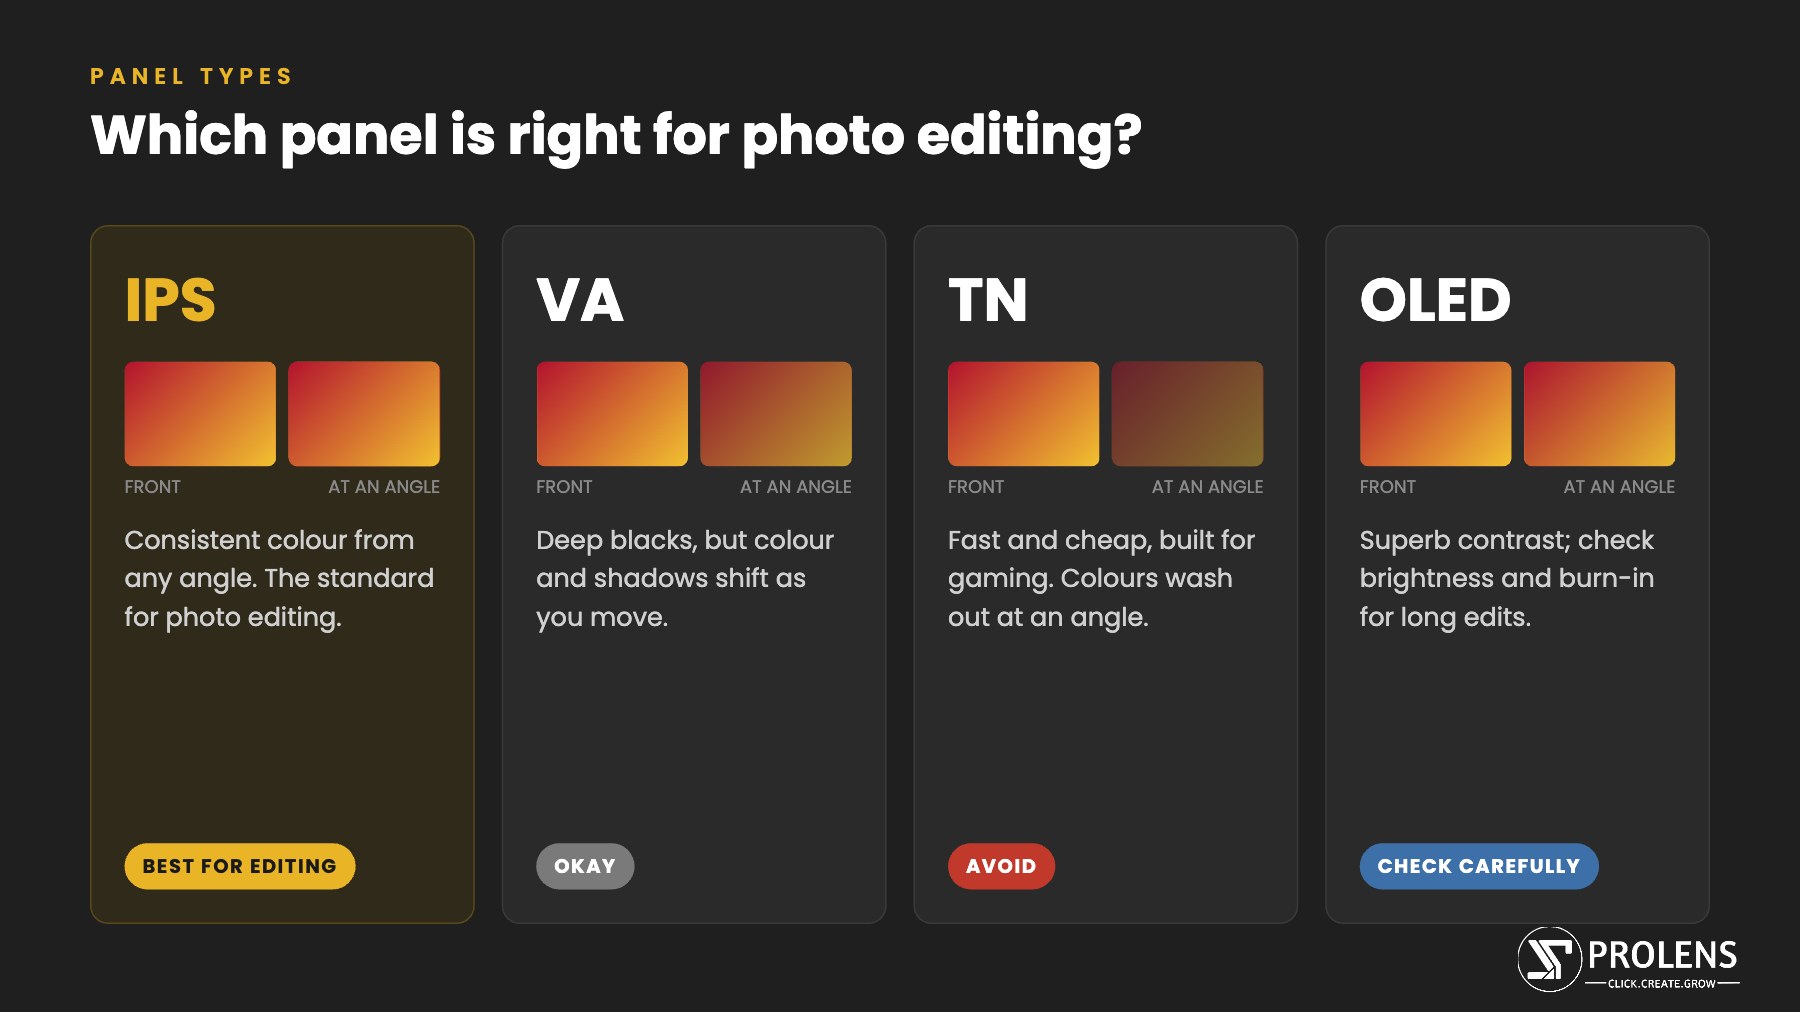
- IPS: the standard for photo editing. Colours and contrast stay consistent when you view the screen from an angle, which matters when a client or second shooter is looking over your shoulder.
- VA: deeper blacks and higher contrast, but colours and shadows shift when you move your head. Better for movies than critical editing.
- TN: fast and cheap, built for gaming. Avoid for photo work.
- OLED: superb contrast and colour, but brightness can vary with what is on screen, and long sessions with static editing panels can raise burn-in concerns. Worth watching, but check carefully before buying for full-time editing.
Choose a matte or anti-glare finish. Glossy screens look punchy in a showroom, but in a typical Indian studio or home office, tube lights and windows reflect straight back at you and change how you judge contrast. Low-reflection coatings, such as BenQ’s Nano Matte panels, keep the image clear without the grainy look of older matte screens. A shading hood goes one step further and blocks side light completely, which is why many photo monitors ship with one.
7. Size and Resolution
Bigger is not always better. What matters is the combination of size, resolution and how far you sit from the screen.
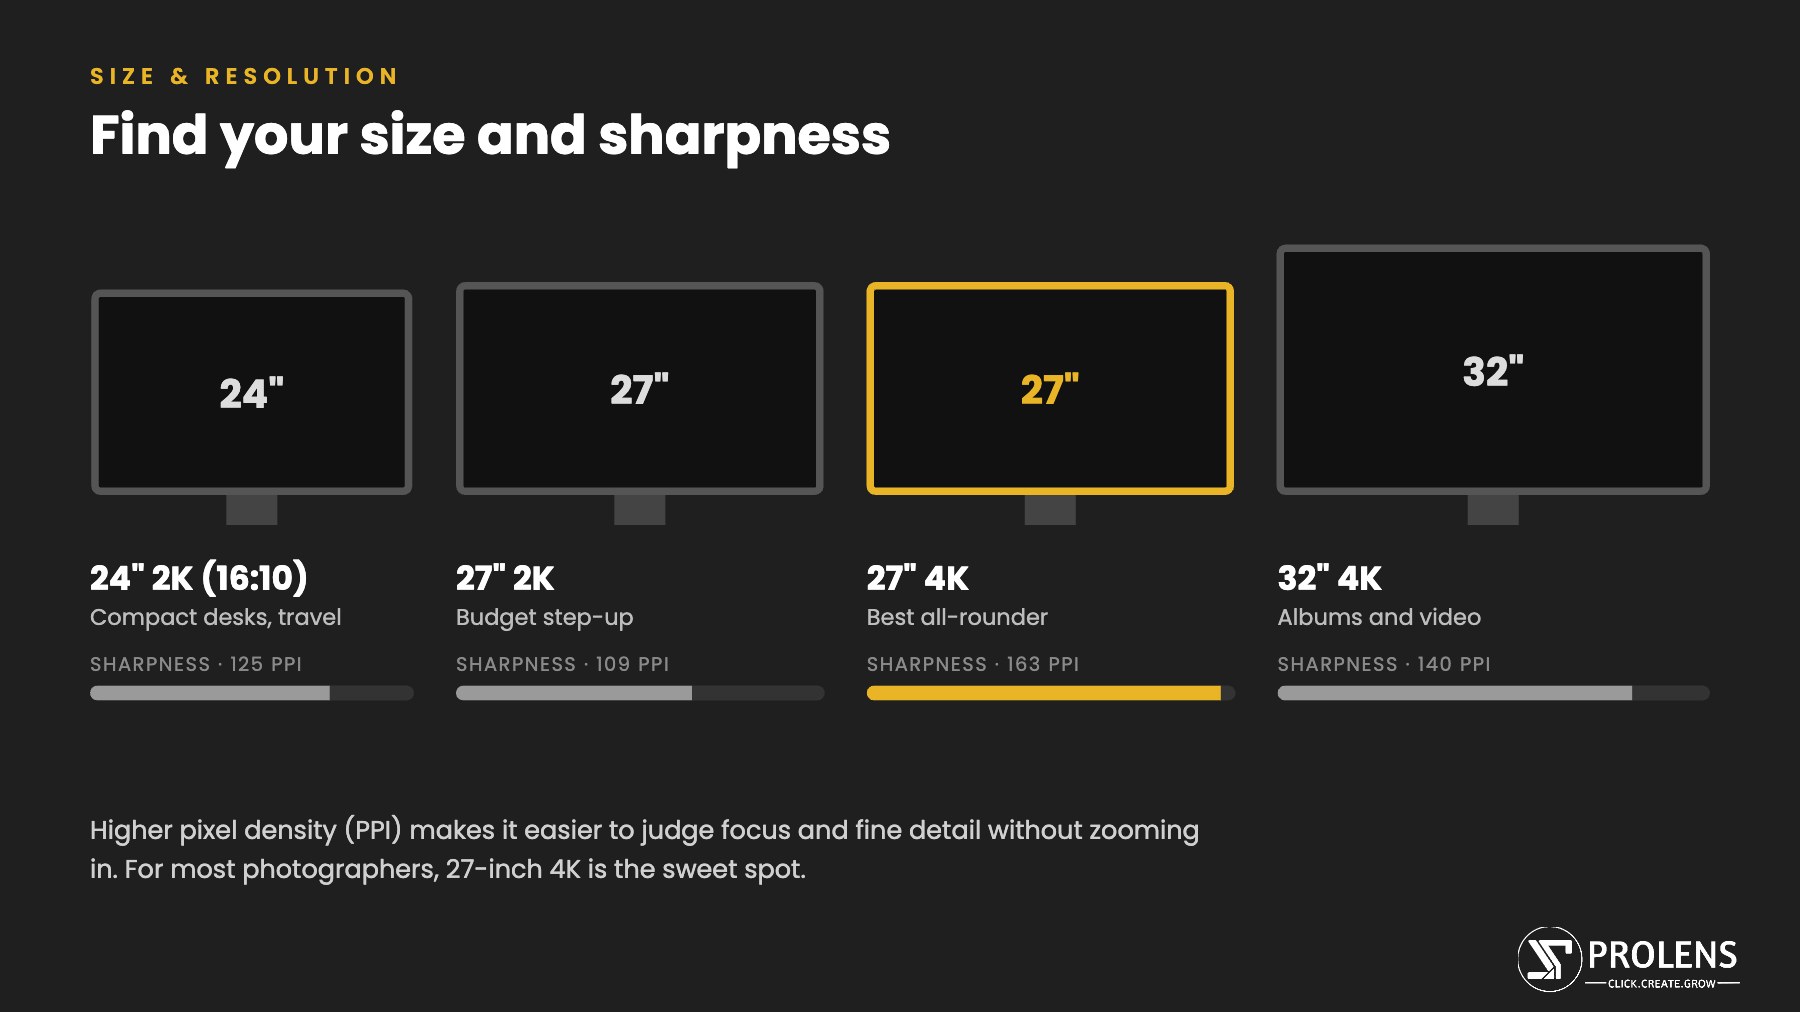
- 24-inch, 2K: compact and easy to carry to a workshop or client meeting. A 16:10 shape, as on BenQ’s SW242Q, gives extra vertical space for Lightroom panels.
- 27-inch, 2K: an affordable step up. Sharpness is fine for most editing, though text and fine detail look softer than on 4K.
- 27-inch, 4K: the sweet spot for most photographers. Images look crisp, you can judge sharpness at a glance, and it works especially well with Macs.
- 32-inch, 4K: ideal for album design and video timelines, where you need the whole spread or timeline visible at once.
8. Bit Depth, HDR and Other Specifications
- 10-bit colour (including 8-bit + FRC panels) helps gradients look smooth. Combined with hardware calibration, it reduces banding in skies and studio backgrounds.
- HDR labels such as HDR10 or HDR400 matter more for video than for still photography. Do not pay extra for HDR if you mainly edit and print stills.
- Refresh rate above 60 Hz is nice for scrolling but makes no difference to colour accuracy.
- Brightness of around 350 to 400 nits is plenty. For print work you will usually calibrate down to 80 to 120 cd/m² anyway.
9. Workflow Features That Save Time Every Day
Once the core specifications are right, a few practical features make a real difference to daily editing:
- Quick colour mode switching: you will move between Adobe RGB for print, sRGB for client galleries and black and white for monochrome work. A physical controller, such as BenQ’s Hotkey Puck, lets you switch in a second instead of digging through on-screen menus.
- Print matching: soft-proofing tools let you preview how a file will print. BenQ’s Paper Color Sync goes a step further by simulating specific printer and paper combinations on screen, which helps reduce test prints.
- Single-cable USB-C: if you edit on a laptop, USB-C with 65 to 90 W charging carries the picture, data and power in one cable. Many current photographer monitors offer 90 W.
- Ergonomic stand: height, tilt and pivot adjustment, so you can rotate the screen for portrait-orientation images.
- Black and white mode: a quick preview of how an image will look in monochrome before you convert it.
10. Matching the Monitor to Your Work
| If you mainly… | Prioritise | Suggested size |
|---|---|---|
| Deliver weddings and events online | Accurate 100% sRGB, low ΔE, matte IPS panel | 27-inch 2K or 4K |
| Design albums and print | 99% Adobe RGB, hardware calibration, uniformity, shading hood | 27-inch 4K or 32-inch 4K |
| Shoot both photos and films | Wide DCI-P3 and Rec. 709 coverage, 4K, hardware calibration | 27-inch or 32-inch 4K |
| Are just starting out | A hardware-calibratable, 99% Adobe RGB 24-inch screen you can grow with | 24-inch 2K |
As a reference point, BenQ’s SW series covers each of these needs: the 24-inch SW242Q for a compact setup, the 27-inch SW272Q and SW272U for 2K and 4K editing, and the 32-inch SW321C for album and video work. Whichever brand you consider, compare the same points: gamut coverage, ΔE, hardware calibration, uniformity and screen finish.
11. Buying Tips for India
- Buy from an authorised dealer so you get the manufacturer’s warranty and service support in India.
- Check the box for the calibration report. A photo monitor without one has probably not been individually calibrated.
- Check the pixel policy and return window before you buy.
- Confirm your connections. Make sure your laptop’s USB-C port supports video, or that you have the right HDMI or DisplayPort cable.
- Use a surge protector or UPS. Voltage fluctuations and power cuts are common in many cities, and a good monitor deserves protection.
- Budget for a colorimeter if you do not already own one. Even the best monitor needs regular calibration to stay accurate.
Quick Photo Monitor Checklist
- IPS panel with a matte, low-reflection finish
- 100% sRGB and around 99% Adobe RGB coverage
- Average ΔE of 2 or lower, with a factory calibration report
- Hardware calibration support
- Uniformity compensation
- 27-inch 4K for most photographers; 24-inch 2K for compact setups
- Shading hood, quick mode switching and USB-C if you edit on a laptop
The Prolens Take
A photo monitor is not a luxury accessory. It is the tool you use to judge every image you deliver, and it usually lasts longer than your camera body. Choose one built for colour, calibrate it regularly, and your galleries, albums and films will look the way you intended on every screen they reach.
Want hands-on guidance on editing, colour and workflow? Join a PROLENS PRO workshop in your city.